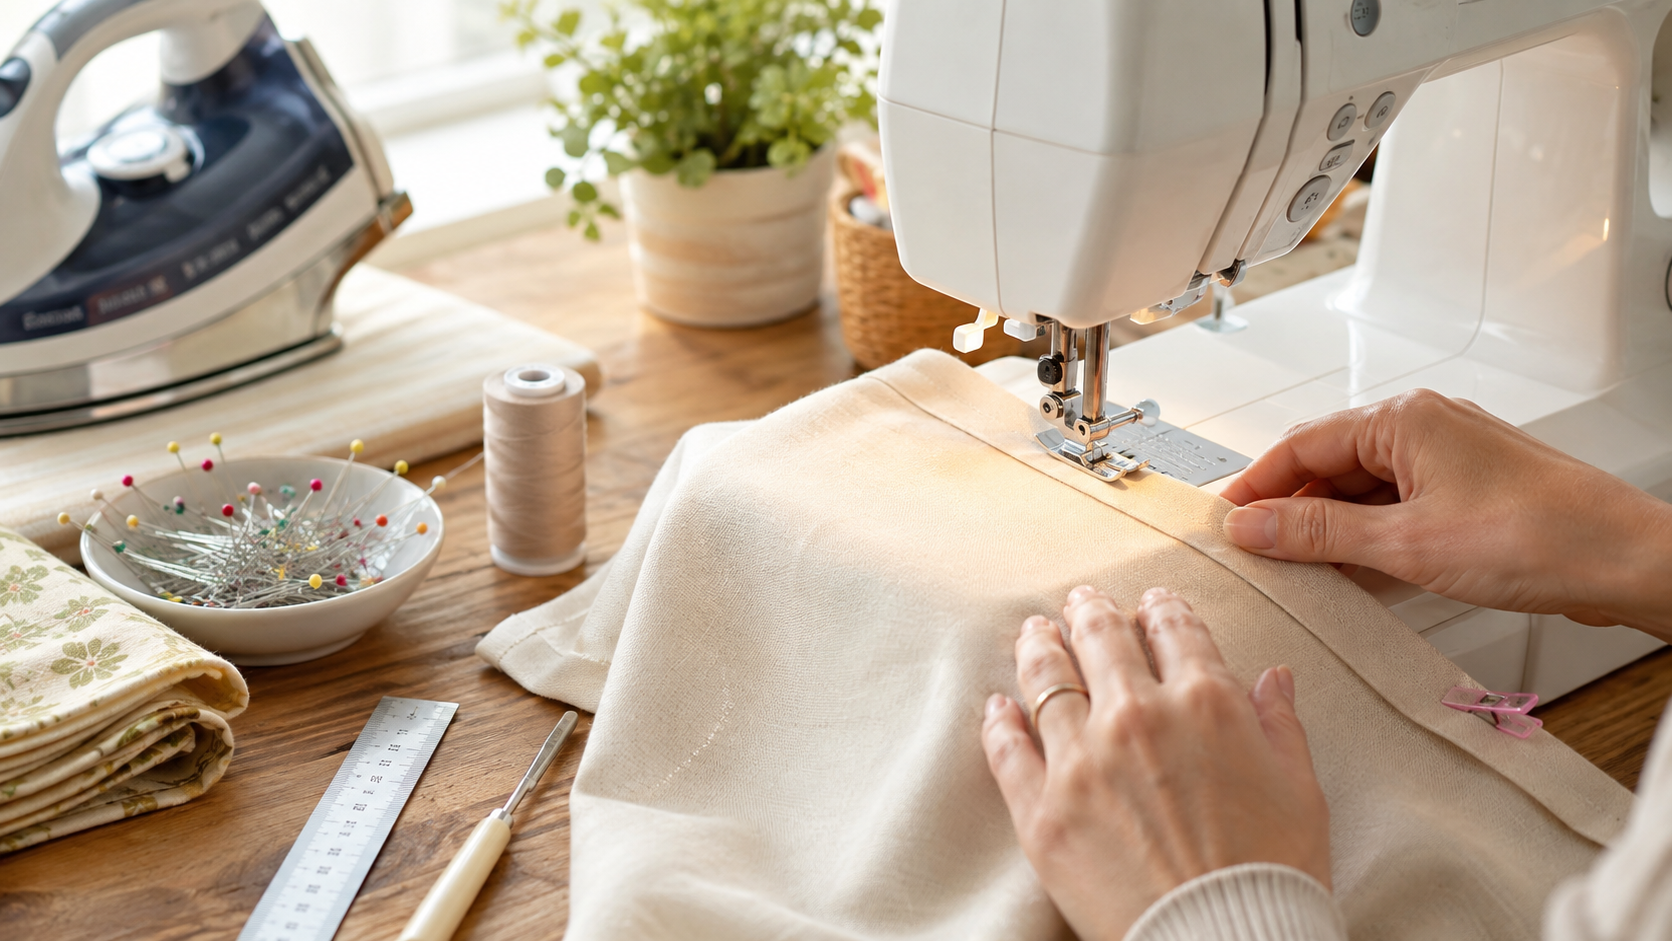
A beautifully sewn hem can make the difference between a project that looks homemade and one that looks professionally finished. Whether you are sewing curtains, clothing, table linens, or a simple tote bag, a straight, smooth hem gives your finished project a polished appearance.
The good news is that sewing a perfect hem isn’t about having years of experience. It mostly comes down to accurate measuring, careful pressing, and taking your time at the sewing machine.
If your hems tend to wander, pucker, twist, or end up uneven, these simple techniques can help you get better results every time you sew.
What Is a Hem?
A hem is the finished edge of a piece of fabric. In most sewing projects, the raw edge of the fabric is folded toward the wrong side and stitched in place.
Hemming accomplishes two important things:
- It keeps the fabric from fraying.
- It gives the project a neat, finished appearance.
There are several different types of hems, but one of the easiest and most useful is the double-fold hem. It’s perfect for beginners and works well for many clothing and home décor projects.
Supplies You’ll Need
You don’t need any specialty equipment to sew a beautiful hem. Gather a few basic sewing supplies:
- Sewing machine
- Coordinating thread
- Iron and ironing board
- Seam gauge or ruler
- Fabric marking tool
- Pins or sewing clips
- Fabric scissors
- Optional edge-stitching or blind-hem foot
Of all these supplies, your iron may be the most important.
Pressing the fabric before you sew helps create crisp folds that are easier to stitch accurately.
Step 1: Start With an Even Fabric Edge
Before measuring your hem, make sure the bottom edge of your fabric is straight.
An uneven raw edge makes it almost impossible to create a consistent hem.
Lay the fabric flat and check the edge using a ruler. Trim away any uneven sections if necessary.
For garments, you may want to hang the completed garment for a while before hemming, especially if the fabric has a lot of drape. This gives the fabric an opportunity to settle before you determine the final length.
Step 2: Measure the Hem Carefully
Consistency is one of the secrets to a professional-looking hem.
Use a seam gauge or ruler to measure the distance from the raw edge to the fold.
For example, you might create a simple double-fold hem by folding:
½ inch toward the wrong side, followed by another ½ inch.
This completely hides the raw edge.
Measure every few inches rather than making one measurement and guessing the rest of the way around.
The more accurately you measure, the straighter your finished hem will be.
Step 3: Press the First Fold
Once you’ve measured your first fold, press it firmly with your iron.
Don’t simply run the iron quickly over the fabric.
Instead, place the iron on the fold for a few seconds, lift it, and move to the next section.
This is called pressing rather than ironing.
Pressing prevents the fabric from stretching or becoming distorted.
Always use an iron temperature that is appropriate for your fabric. Delicate or synthetic fabrics may need a lower temperature.
Step 4: Fold and Press Again
For a double-fold hem, turn the fabric up a second time.
If your first fold was ½ inch, fold another ½ inch.
Press the second fold carefully.
At this point, the raw edge of your fabric should be completely enclosed inside the hem.
You should now have a crisp, straight folded edge that practically tells you where to sew.
This is exactly why pressing makes such a difference.
Step 5: Pin or Clip the Hem
Even if your folds are well pressed, securing the hem before sewing can help prevent it from shifting.
Place pins perpendicular to the folded edge every few inches.
You can also use sewing clips, which are especially helpful when working with:
- Thick fabric
- Vinyl
- Coated fabric
- Multiple layers
- Fabrics that show pinholes
Don’t stretch the fabric as you pin or clip it. Keep everything relaxed and flat.
Step 6: Choose the Right Stitch Length
For most woven fabrics, a straight stitch with a length of approximately 2.5 to 3 mm works well.
Very lightweight fabric may look better with a slightly shorter stitch, while heavier fabrics may benefit from a slightly longer stitch.
Before hemming your actual project, test your stitch on a fabric scrap.
Check the:
- Stitch length
- Thread tension
- Needle size
- Thread color
A few seconds of testing can save you from having to remove an entire row of stitches later.
Step 7: Use Your Machine as a Sewing Guide
One of the biggest mistakes beginners make when hemming is watching the needle.
Instead, watch the edge of the fabric in relation to the markings on your sewing machine’s needle plate.
Pick a seam guide and keep your folded fabric edge aligned with it as you sew.
This helps you maintain a consistent distance from the edge.
If your machine doesn’t have an easy-to-see guideline, place a piece of painter’s tape or removable washi tape on the machine bed to create one.
It’s a simple trick that can dramatically improve straight stitching.
Step 8: Sew Slowly and Steadily
Speed isn’t your friend when you’re trying to sew a beautifully straight hem.
Sew at a comfortable pace and concentrate on keeping the folded fabric edge aligned with your guide.
Let the feed dogs move the fabric.
Avoid pulling it from behind or pushing it toward the needle. Pulling on the fabric can stretch it and cause puckering.
When you reach the end, backstitch a few stitches unless the pattern instructions recommend another finishing method.
Step 9: Press the Finished Hem
You’re not finished quite yet.
Give the completed hem one final pressing.
Press from the wrong side first, and then press from the right side if appropriate for the fabric.
This final step helps flatten the stitches and gives your project that crisp, finished look.
It’s one of the easiest ways to make handmade sewing look more professional.
How to Hem Curved Edges
Straight hems are relatively easy. Curves can be a little more challenging.
The wider the hem allowance, the more difficult it becomes to turn a curved edge smoothly.
For curved hems, use a narrower hem.
For example, try:
- Folding the raw edge approximately ¼ inch toward the wrong side.
- Pressing carefully.
- Folding another ¼ inch.
- Pressing again.
- Stitching close to the inside folded edge.
Working with smaller sections at a time can also help prevent puckering.
For very tight curves, you may need to use a specialized hemming technique depending on the fabric and project.
How to Prevent a Wavy Hem
Have you ever finished hemming a knit shirt only to discover that the bottom looks stretched and wavy?
This happens because knit fabric stretches as it passes through the sewing machine.
To reduce waviness:
- Avoid pulling the fabric.
- Reduce presser-foot pressure if your machine allows it.
- Use a stretch or ballpoint needle when appropriate.
- Consider using a walking foot.
- Test different stitch settings on scraps.
- Press the finished hem carefully.
A twin needle can also create a professional-looking finish on many knit garments.
Tips for Hemming Different Fabrics
Different fabrics behave differently under the sewing machine.
Lightweight Fabrics
For chiffon, voile, and other lightweight fabrics, use a narrow hem. Large hems can look bulky and may distort delicate fabrics.
Medium-Weight Cotton
Cotton is one of the easiest fabrics to hem and is excellent for practicing your technique. A standard double-fold hem usually works beautifully.
Heavy Fabrics
Denim, canvas, and upholstery fabrics can become bulky when folded multiple times.
Use a larger needle designed for heavier fabric and consider reducing bulk at seams before folding the hem.
Knit Fabrics
Knits require stitches that can stretch with the fabric. Depending on the project, you may use a stretch stitch, narrow zigzag, twin needle, or coverstitch machine.
Common Hemming Mistakes
Even experienced sewists occasionally end up with a hem that doesn’t cooperate. Here are some common problems to watch for.
Skipping the Iron
Trying to fold the fabric while you sew usually leads to uneven hems.
Solution: Measure and press your hem before sewing.
Watching the Needle
Watching the needle makes it surprisingly difficult to sew straight.
Solution: Watch the fabric edge against your seam guide.
Pulling the Fabric
Pulling can stretch or distort your project.
Solution: Let the feed dogs move the fabric naturally.
Using the Wrong Needle
A dull or incorrect needle can cause skipped stitches, puckering, or fabric damage.
Solution: Match your needle type and size to your fabric.
Sewing Too Fast
The faster you sew, the harder it becomes to make small corrections.
Solution: Slow down, especially when approaching curves, seams, or corners.
Not Measuring Often Enough
A tiny difference in your fold can become very noticeable across a long hem.
Solution: Use a seam gauge and check your measurement every few inches.
The Secret to a Perfect Hem
If there is one hemming rule worth remembering, it is this:
Measure. Press. Sew. Press again.
It may be tempting to skip the pressing steps when you’re eager to finish a project, but your iron is one of the best tools you have for creating professional-looking sewing.
Accurate measuring creates an even fold.
Pressing creates a crisp sewing guide.
Slow, controlled stitching keeps everything straight.
And one final press gives the finished hem a polished appearance.
Practice Makes Better Hems
Perfect hems don’t require perfect sewing.
Like almost every sewing skill, hemming becomes easier with practice. Start with cotton fabric and practice creating several different widths of double-fold hems. Pay attention to where you’re looking while you sew and experiment with the seam guides on your machine.
Before long, you’ll develop a rhythm for measuring, pressing, and stitching that makes hemming feel almost automatic.
And once you master a beautiful basic hem, you’ll have a skill you can use on everything from skirts and dresses to curtains, napkins, table runners, tote bags, and dozens of other sewing projects.
The next time you’re tempted to rush through the final few inches of a project, remember that the hem is one of the details people notice most. Take a few extra minutes to measure accurately, press carefully, and sew steadily.
That little bit of extra attention can turn a good sewing project into one that looks beautifully finished.